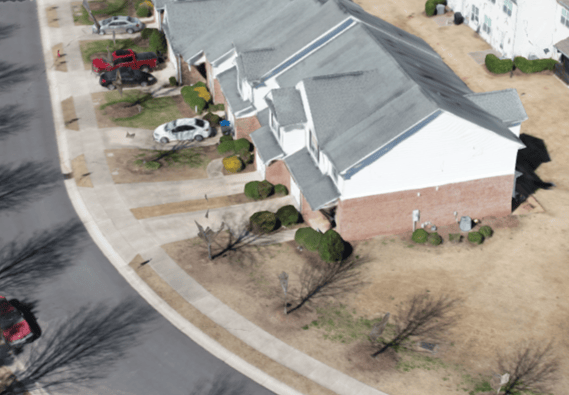
Capturing Trees with Photogrammetry
Capturing shade information from barren trees is never a perfect science, whether you are using a Suneye, Lidar, or Scanifly. For most of the year trees are covered in leaves, which make them much simpler to recreate with a 3D mesh. In the winter, branches of deciduous trees lose all of their leaves, and will not be recreated perfectly. These branches are often merely inches wide and are hidden behind other, even more complex and smaller twigs. Without the leaf cover to make it appear as a single simple object, it is often under-modeled or not modeled at all. This limits shade capture technology, but we will be going over some ways to work with/around it in Scanifly.
Importing Tree Models
For deciduous trees that are leafless after Fall, we recommend making sure that they are well captured if you wish to have them in the model. If you are curious about how to capture a scene well in Scanifly, check out our article, Example Residential Imagery.
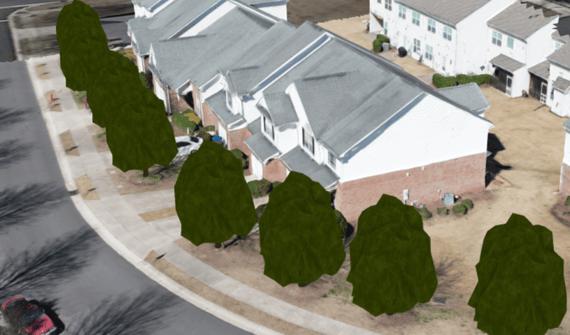
Sometimes, particularly with non-deciduous trees, an additional orbit can be done that just circles the tree(s). Sometimes, you will only get the main body of the tree to model, and there will be no upper branches. This is still good data to have, so that you can accurately place your imported tree model. 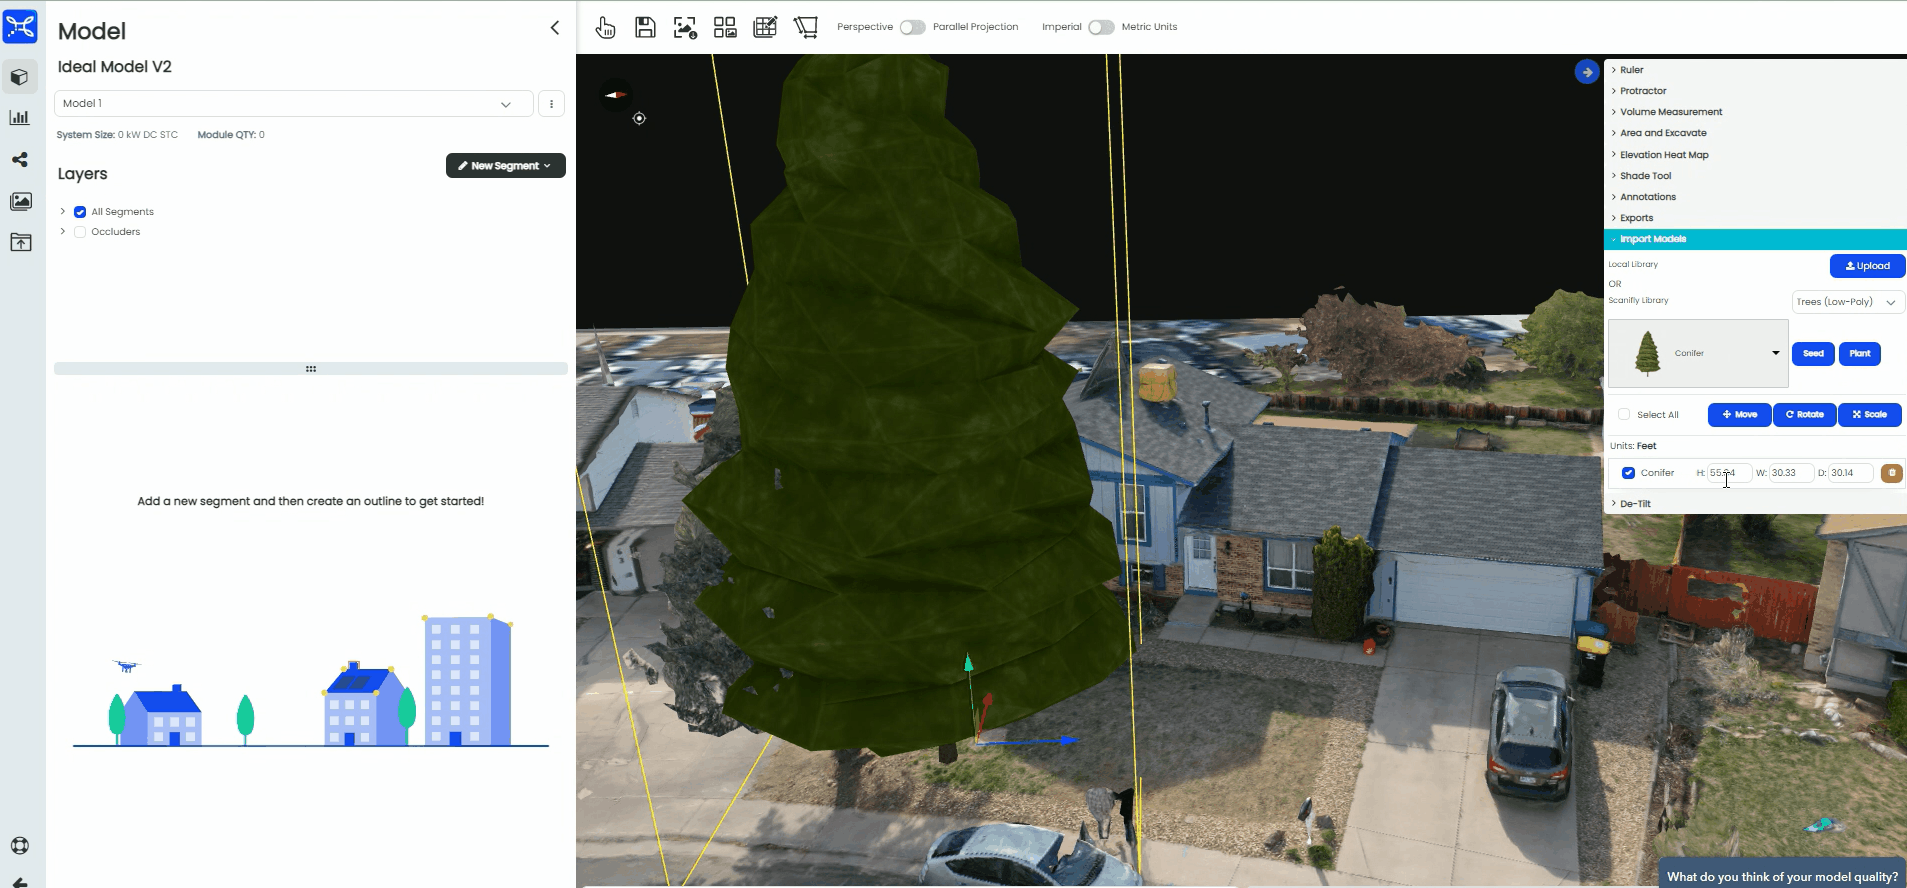
Better Data capture on site
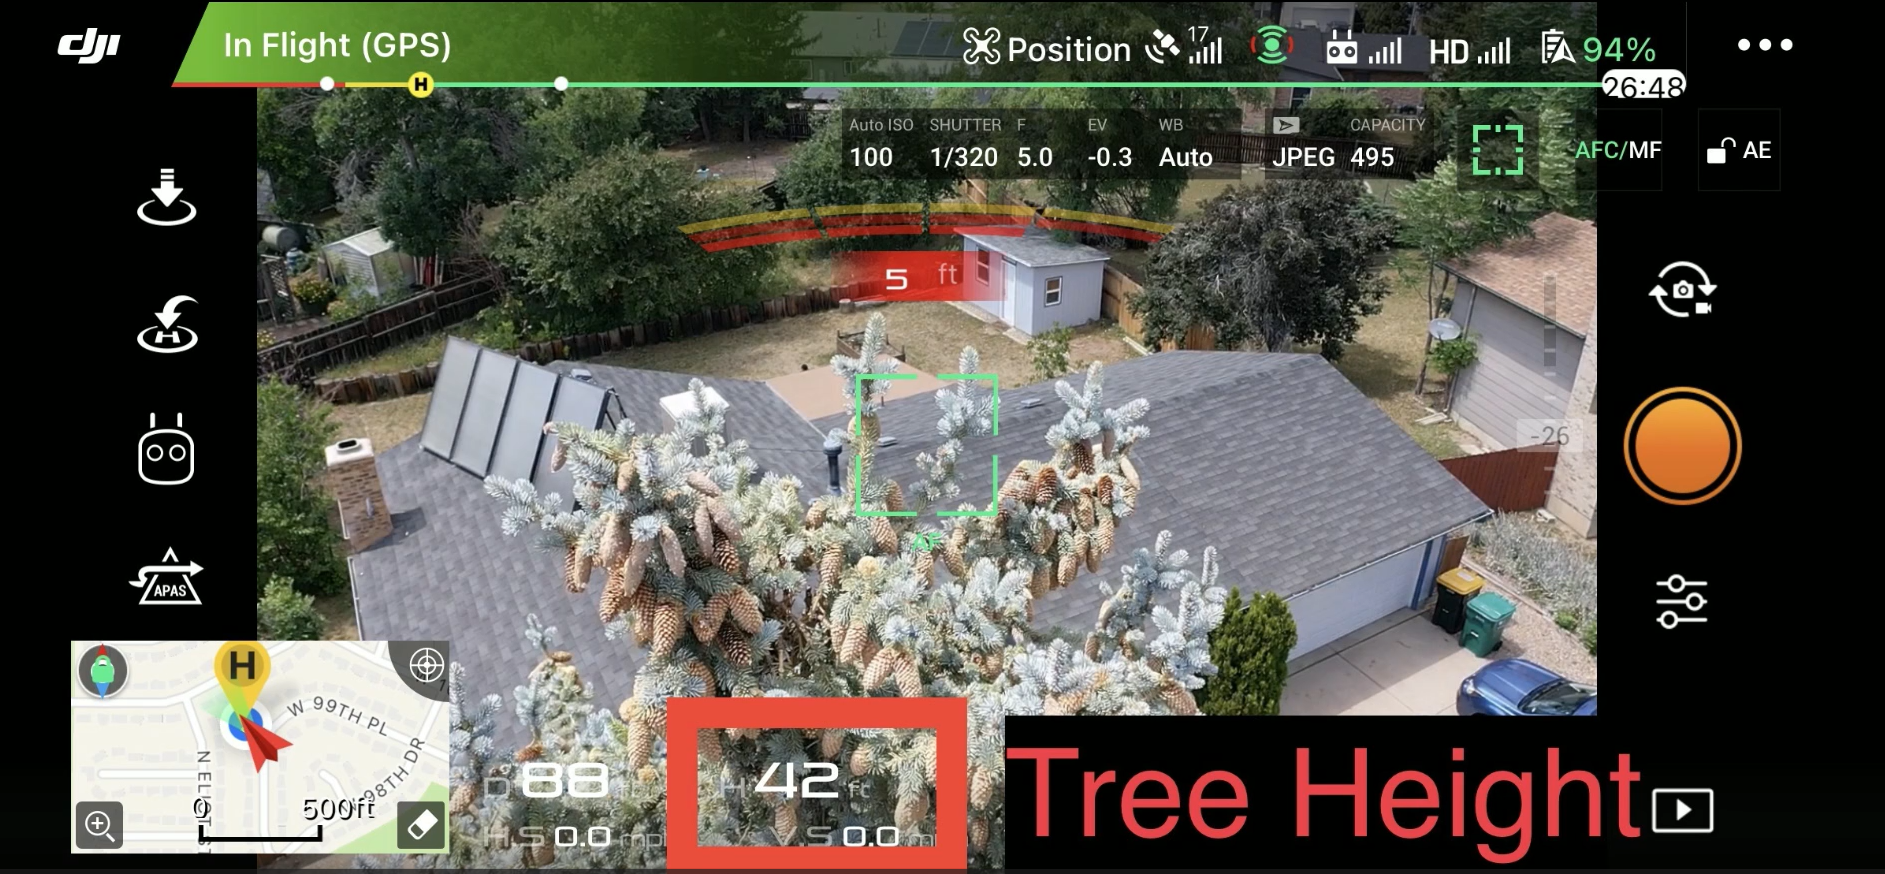
Additionally, making note of the trees height while on-site using your drone can be very helpful when importing tree models, so that you can scale the imported tree as close as possible to the real thing.
We recommend carefully flying above a tree with the camera facing down to make note of the displayed height (H) shown on the interface. From there it easy to make note of the tree height by taking a screenshot for the design team to use once the model is completed.

Pro Tip: Subtracting the height that the drone was flying over the tree (~6') when placing the model leads to accurate sizing.
Shade Recreation Check
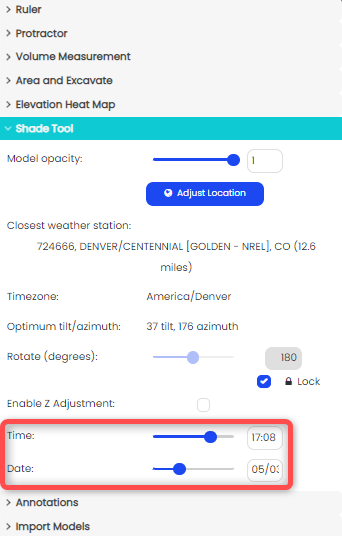
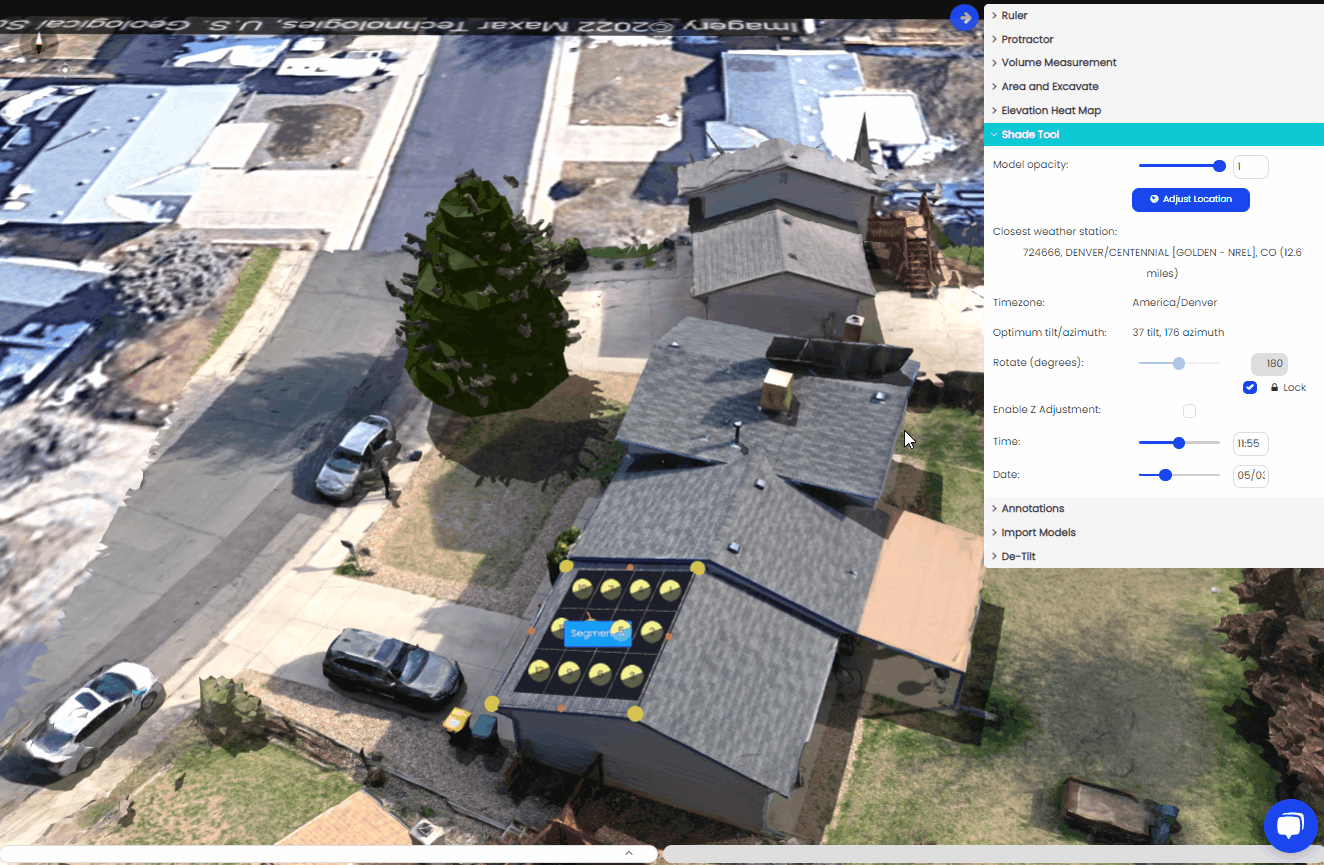
Once you place your tree model into the project and size it as accurately as you can, we can give it a check by using the Shade Tool in the right side menu.
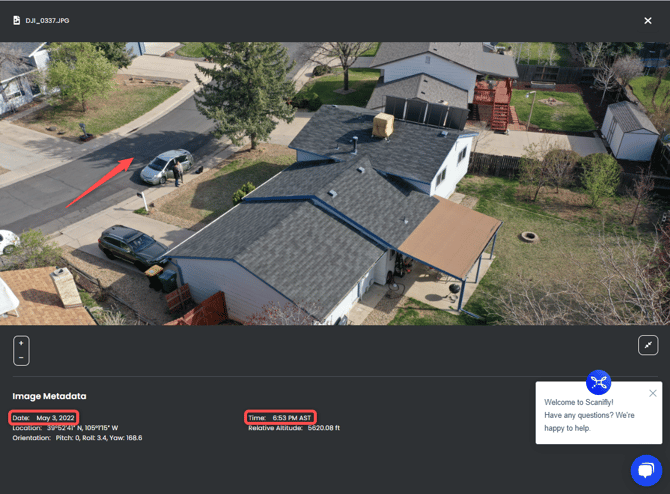
The time for this particular photo was noted in AST, so make sure to take time zones into consideration!
You may see the shade from the tree in the model, but if not, you can open up your drone photos and see it on one of your context orbit photos, like the one above. If the dataset was collected a while ago, take note of the date and time as your reference for the shadow.
Make sure to adjust the model using the import model adjustment options outlined in our Import Trees article.
Using the Shade Tool on the right side of the screen, adjust the time and date to when the data was collected. If the tree model was aligned accurately, the shade profiles should be a near match!
Better Safe than Sorry
If you are unsure of the size of the tree, we always recommend to avoid overpromising and underdelivering. In Scanifly, that could mean making the tree slightly larger than it probably is, or adjusting the de-rates of your system in the Project Info menus.