Checklists
Checklists is a tool in our mobile app that anyone on site can use to help capture and document all of the necessary information for their use case.
How to create a new Checklist
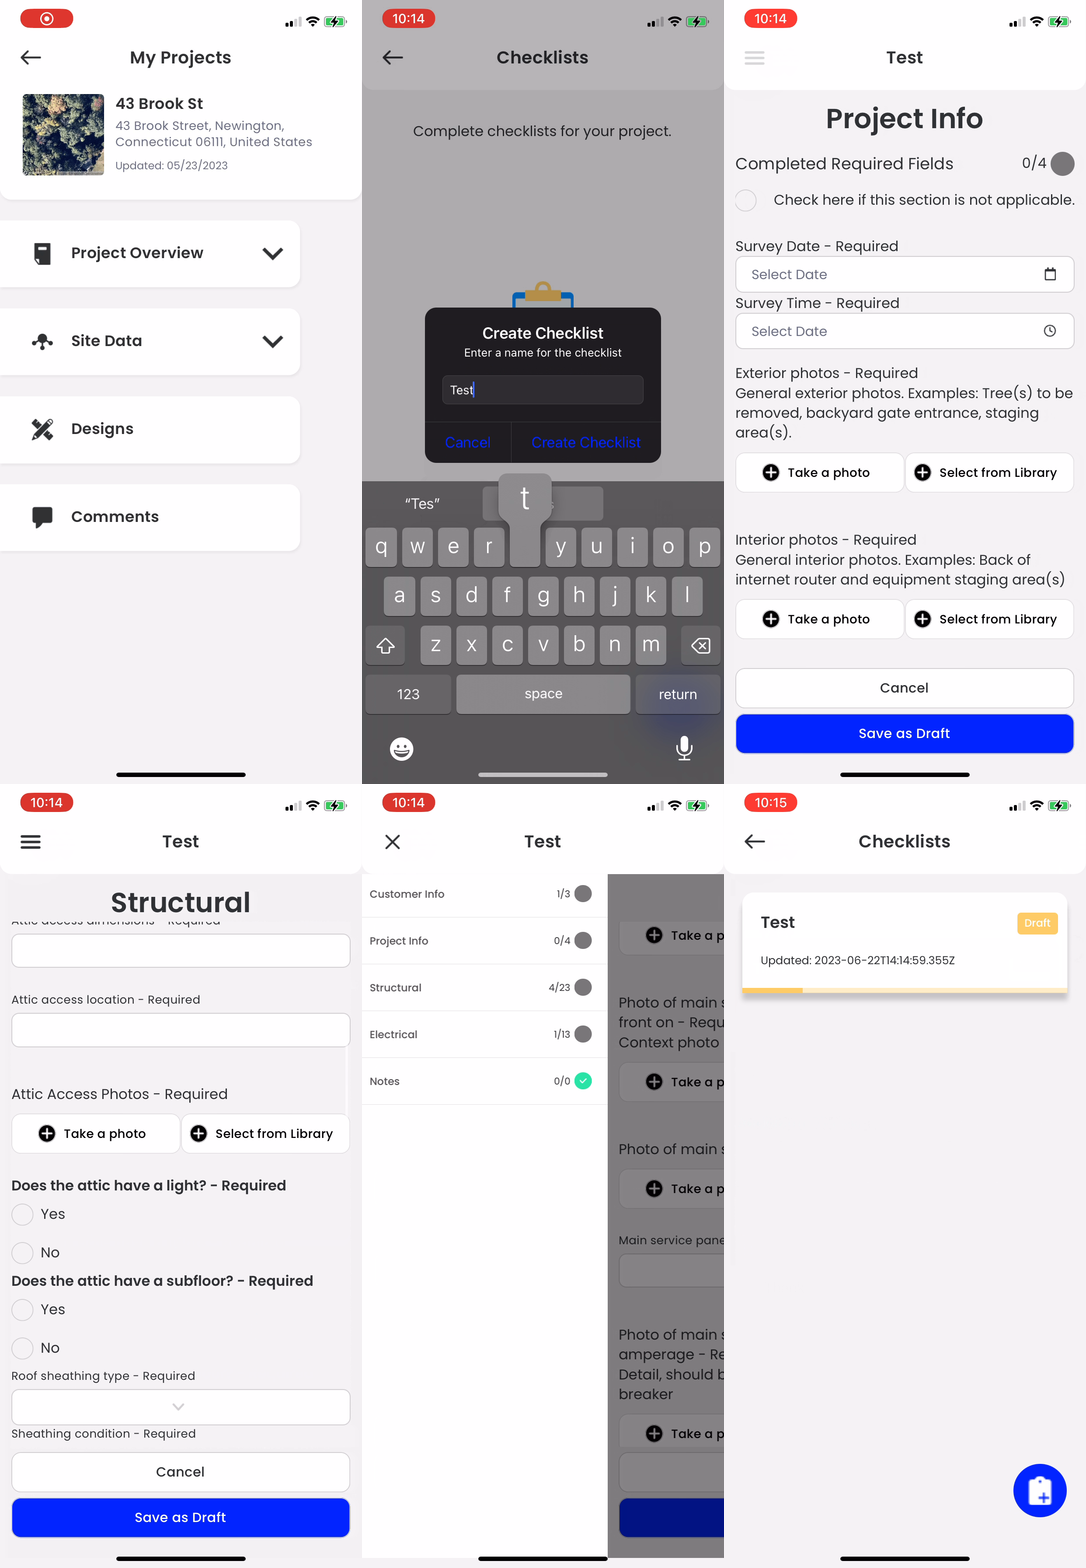
To create a checklist, open a project in the Scanifly Mobile App, select checklists from the Site Data dropdown menu, tap the blue clipboard icon, enter the checklist name, and fill out the fields.

What are the steps to complete a Checklist?
The checklist is made up of five main sections.
- Customer Info - Self explanatory, includes customer name, address, phone number, and email.
- Project Info - General photos of the site and a date for the survey.
- Structural - All info regarding the structure of the roof(s) being inspected, along with several photo fields to help document it.
- Electrical - All info covering the main electrical panel, meter, any subpanels, and any possible equipment installation locations, along with several photo fields to help document it.
- Notes - This section is for any additional notes or photos that you may need to take as you go through your site survey.
When taking photos, you can take images with the "Capture" or the "Capture & Edit" camera modes.
Checklist Completion Progress
You can track your completion by opening the left menu (swipe left to right) and looking at the gray circles with the numbers next to them. The numbers signify the completed required fields vs the total required fields in that section. When all required fields in a section have been completed, the corresponding circle will turn green.
Need to Skip a question?
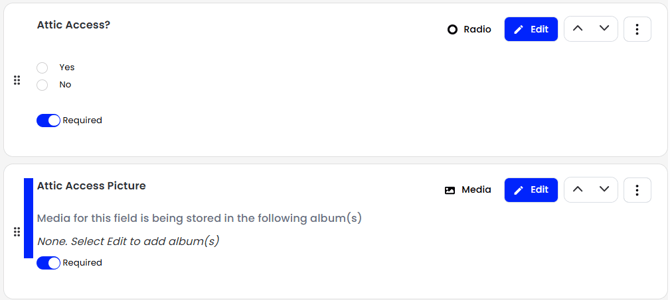
Conditional formatting is a great way to make sure that all of the questions you need answered can stay required, while still giving the field user the option to not answer. Simply set up a Yes/No question, and then have the question that you need answered be conditional based on the answer to that question. In the example below, the user will only get the attic access picture question if they answer yes to there being attic access.

Tip
Always over-collect data. "Measure twice, cut once" in site surveying means collecting as much data as you can in the beginning, to avoid having to return to site to answer a designer or AHJ's questions. No one will be upset that you collected too much data. Take advantage of the notes section to make sure the information is still gathered.
Completing your Checklist
Once you have filled out every required field in your checklist, you will be ready to close it out and enable it's export. This can be found in the project folder, under "Site Data". Open up the Checklists tab, open your completed checklist form, and click on the download button in the upper right hand corner.
If you have any questions about our Checklists feature, or wish to take a more in depth look with us, please reach out to hello@scanifly.com.