What is the Occluder Tool?
- For our purposes, it is a 3D volume used to remove, or hide, objects within a model. In just a few clicks, you can swiftly remove things such as trees, obstructions, and structures from the 3D environment.
- In addition to visually hiding objects in the 3D environment, the Occluder also prevents the objects within itself from casting a shadow on the site when using the Shade Tool or Solar Access Viewsheds functionality in Scanifly.
- You can use the Occluder tool as a quick and easy way to simulate what would happen if trees or other shade obstructions were removed from the model, and what impact that would have on your design and production.

How to Place an Occluder
The Occluder tool is located between the Rulers and Animations menus on the left. Because this feature has no dependencies, you’re able to add an Occluder at any point during the design process.

If you click on 'Occluders', you will see two options for shapes: Cube and Cylinder. This feature is dynamic, which means you’re able to change the shape later at your discretion. For this example, we’ll use the cube.

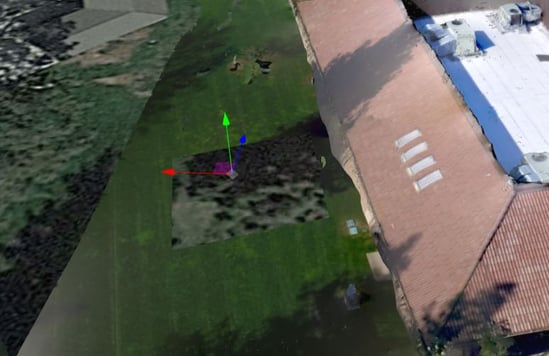
From here, click ‘Add Occluder’. Now you can move your cursor and click where you want it placed on the 3D model.
After clicking into the model, this is what the Occluder will look like at first.
Occluder Adjustment Options
Once placed, you now have the ability to move, rotate, scale and change the opacity of the Occluder.

Adjust Opacity of Occluder
Changing the opacity will make the Occluder more or less visible depending on your preference.
Whether the opacity is 0.1 or 1, its functionality remains the same for shade purposes.


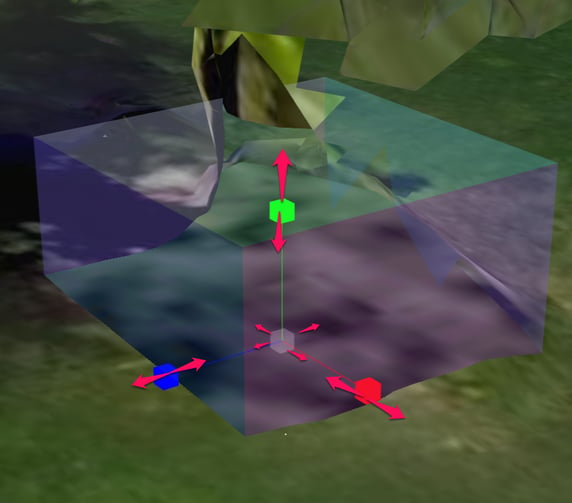
Move an Occluder

The first function selected is move. No matter where the Occluder was placed initially, you’re free to move it wherever you’d like in the model.
asdf
Don't be afraid to move around the model while placing and Occluder!
Interacting (rotating/panning/zooming) in model space between movements and adjustments of the Occluder will help you achieve perfect placement.
a
By clicking the squares between the arrows, we can move across the X and Y plane or the Y and Z plane.
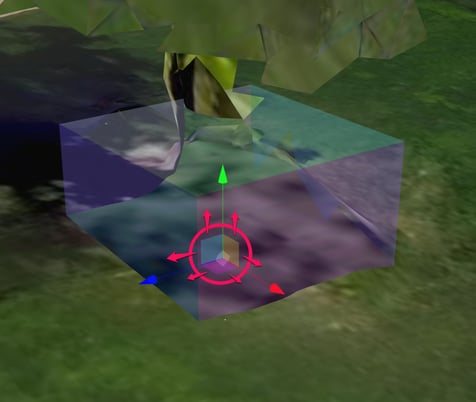
By selecting the diamond in the center, we can simply move around the model freely.
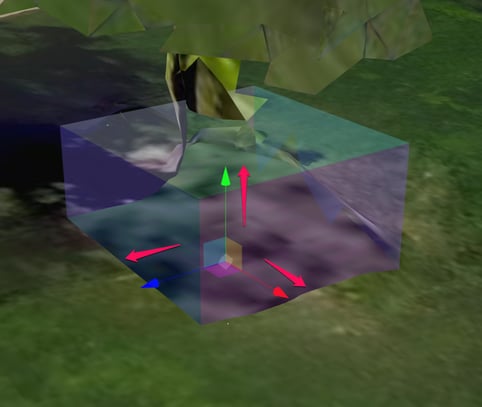
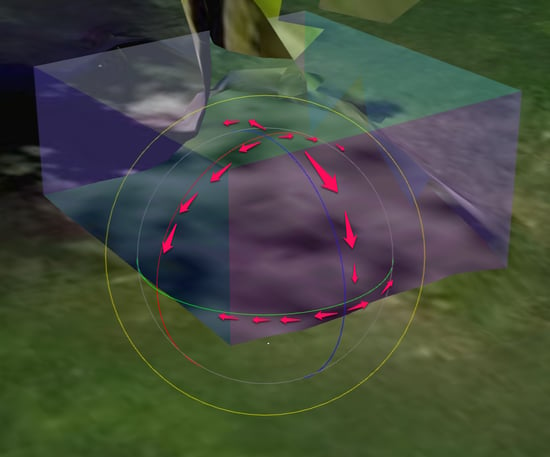
Rotate an Occluder

You can also rotate the Occluder. Instead of arrows like we had for moving the Occluder, we now have circles representing the X, Y, and Z axis. If you click and drag, the Occluder will rotate along the corresponding axis. In addition, there is a fourth, larger yellow circle around the three in the center. This circle follows parallel to the camera angle you’re viewing the model.
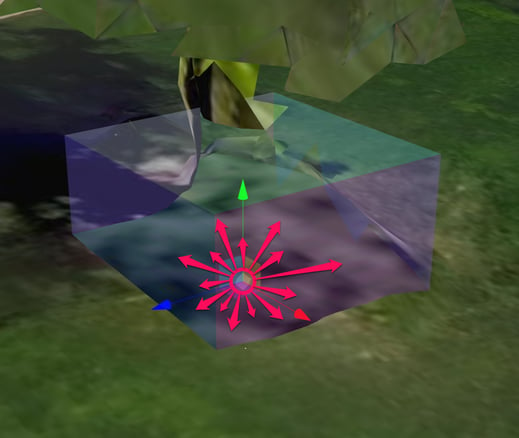
Scale an Occluder
![]()
By clicking the corresponding arrows, you can move along the X, Y, or Z axis, just like the move function. By selecting the square in the middle, it will scale along all axes proportionally.
Viewsheds and the effect of the Occluder
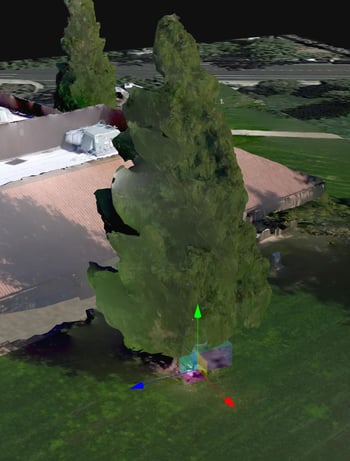
In this example, we will see how our Occluder can hide a tree in the model.
The first screenshot shows what the scene looks like with the tree in place. You can see how it will cast a shadow onto the roof to the east.
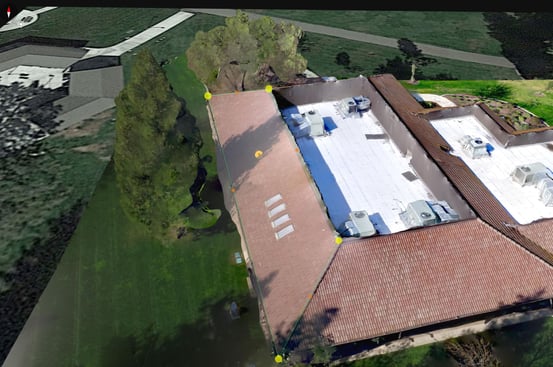 Screenshot showing a tree near a roof that will cast a shadow. (BEFORE ADDING OCCLUDER)
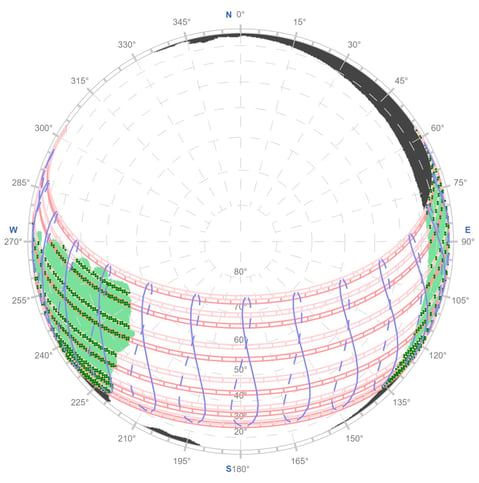 Screenshot showing a viewshed taken on the roof to the east of the tree, showing the tree on the left side of the viewshed. (BEFORE ADDING OCCLUDER)
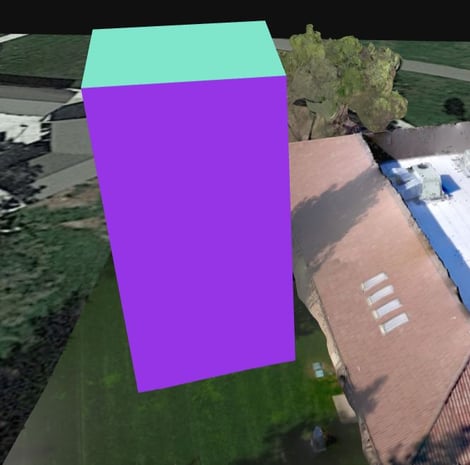
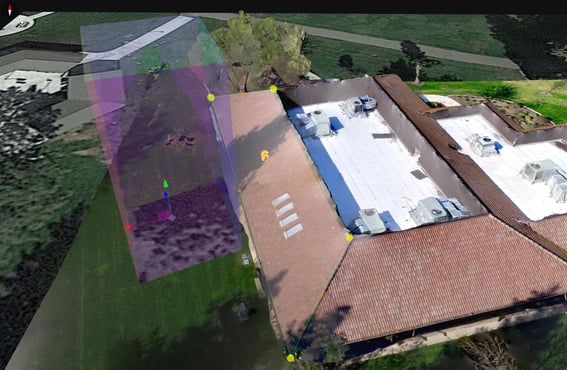 Screenshot showing the Cube Occluder tool being used to occlude (hide) a tree near a roof that would have cast a shadow on the roof.
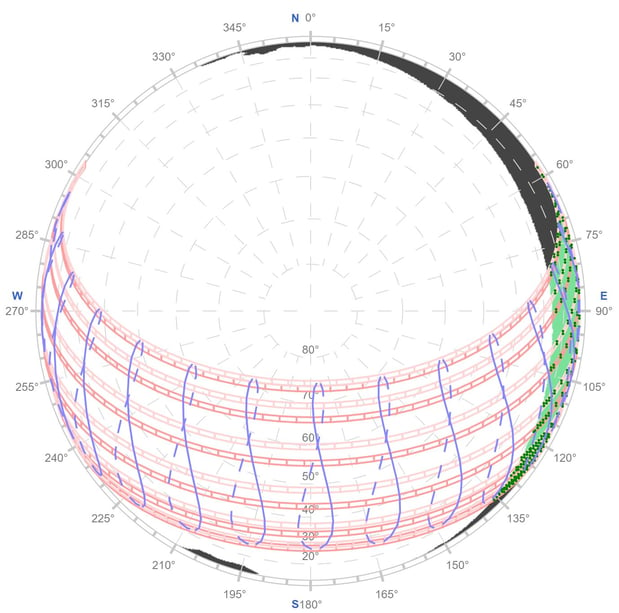
Screenshot showing a viewshed taken on the roof to the east of the tree, after adding the cube occluder, showing that now the tree does not impact the viewshed on the left side.

Screenshot comparing the different shade measurements with and without the Occluder.
Other things to mention
- Similar to all other model features in Scanifly3D, the Occluders you create are stored in the design upon saving. If you’re adding Occluders to a copied version of a design, it will save within the copy.
- To see a list of individual Occluders you’ve made for a project, simply click the plus button to the left.
- By hovering your mouse over an Occluder, you can rename or delete them accordingly.
- From there, you can turn on or off individual Occluders, or all of them at once, by selecting the corresponding radio box.