![SCANIFLY-LOGO-Color-2022.jpg]](https://help.scanifly.com/hs-fs/hubfs/SCANIFLY-LOGO-Color-2022.jpg?height=40&name=SCANIFLY-LOGO-Color-2022.jpg)
Components can be found in your Design Settings. Within the Components, lives the Company Module Library. This is where you can add, edit, and remove modules to your module library.
Adding Modules
In order to add new modules, you have two options.
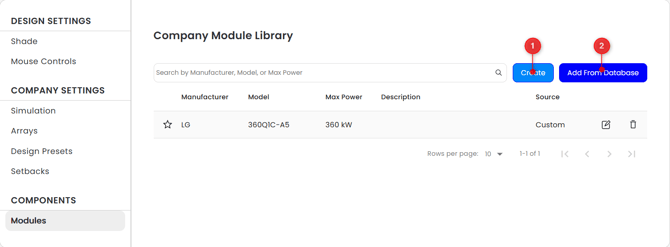
- Click "Create" to manually enter your module's data. Have the spec sheet handy, fill out all fields, then click "Save" to add it to your library.
- Click "Add From Database" to search our module database by manufacturer, model number, or Pmax. Once you find the correct module, click the + icon on the left to add it.
You may need to search for the exact model # to find your module. For example you may know a module as "QCells 400W" but really the name of the panel model # is "Q Cells Q.PEAK DUO ML-G10+ 400W".
Editing Modules
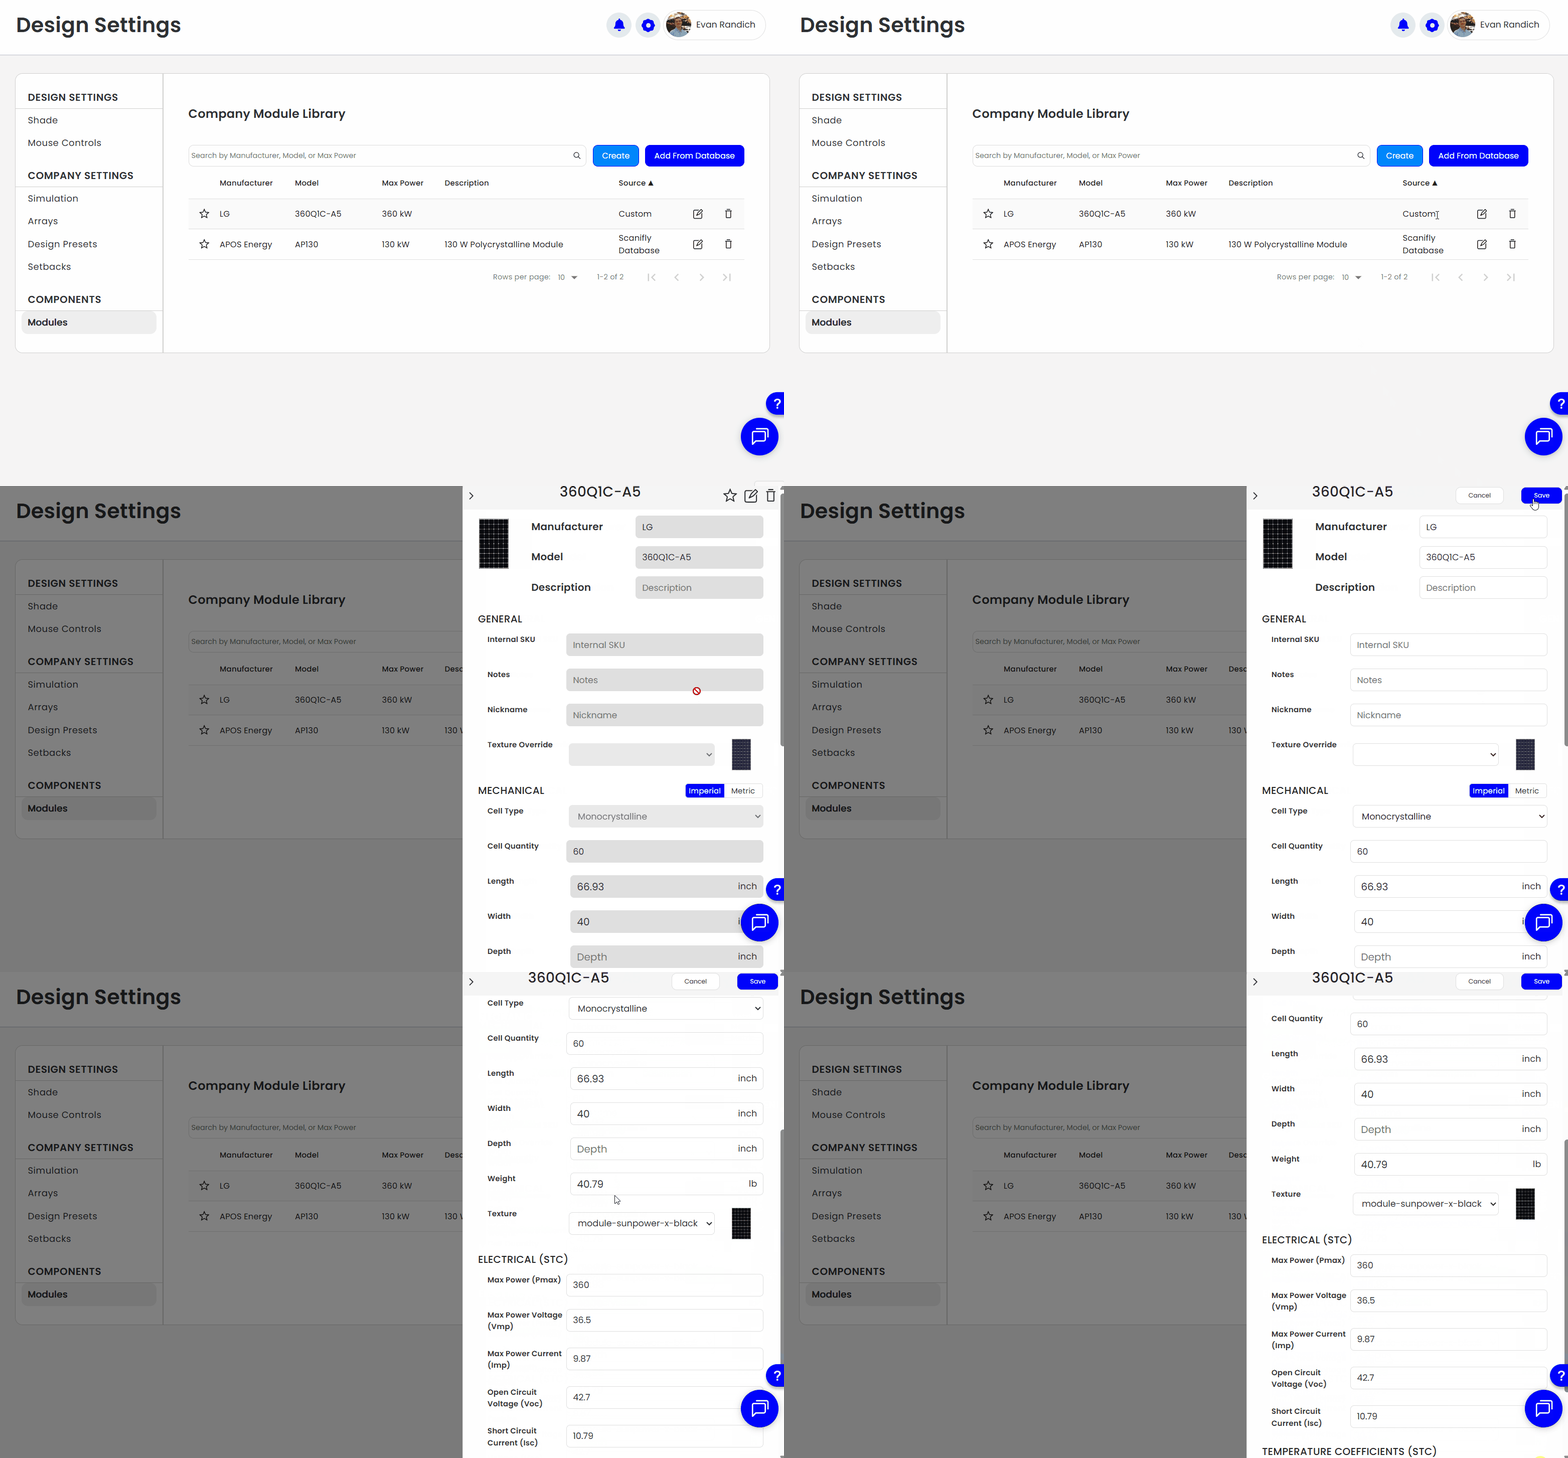
Once added, the module appears as a row in your Company Module Library. Click the edit icon towards the end of that row to view its properties, then click the edit icon on the top right to modify any values.
Deleting Modules
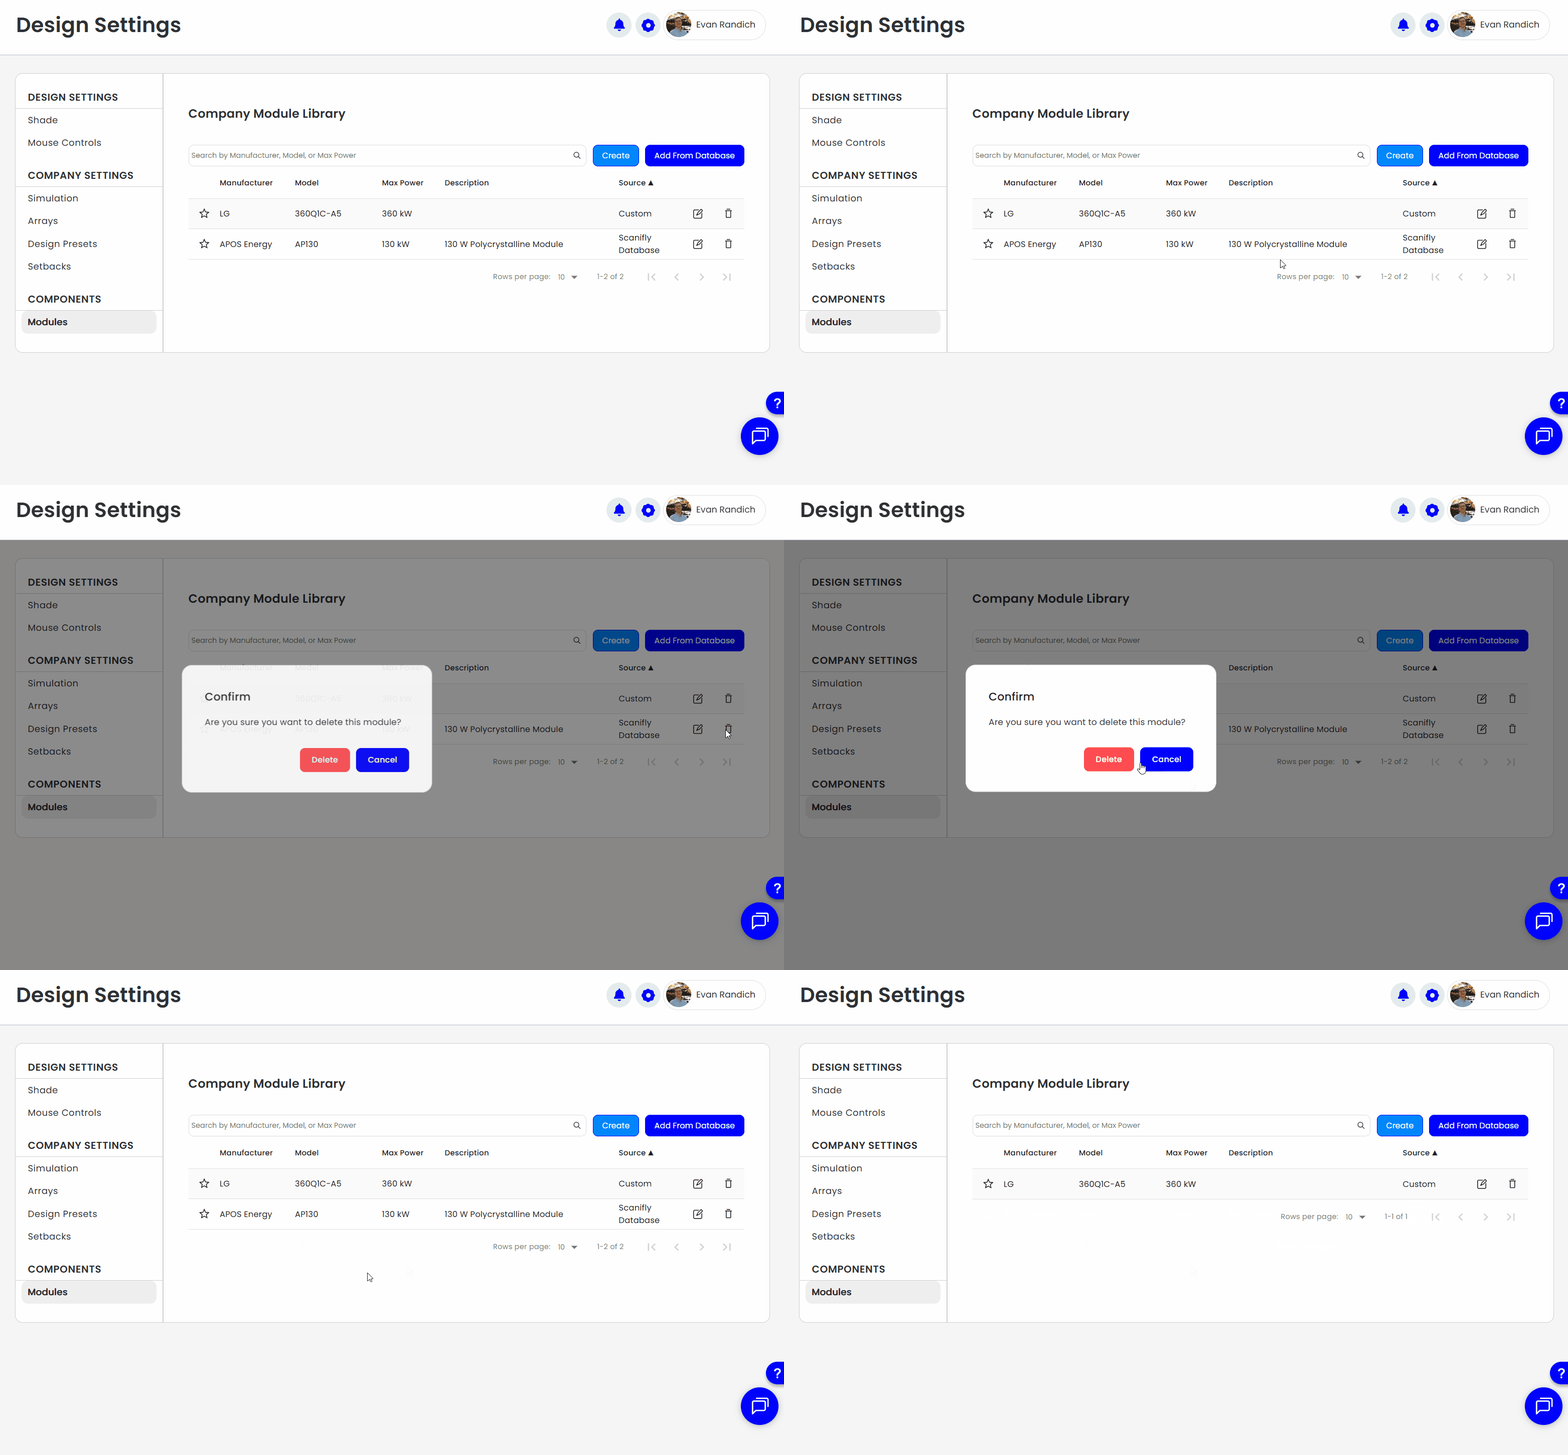
You can delete modules from the Company Module Library by clicking on the trashcan icon to the right of the edit icon, and confirming by clicking the red "Delete" button.
Other Actions
Favoriting - In the Module Library, you are able to click the Star to the left of the module Manufacturer name to "favorite" the module. This means that the module will be the first one to show up in your list when you add a module to a segment.
Sorting - Each of the columns in the module library can now be sorted in Ascending or Descending order, making it easier to quickly find the highest Pmax module, view by manufacturer/model number alphabetically, or view custom built modules before the Scanifly Library modules.