Simple Design: Sales Process
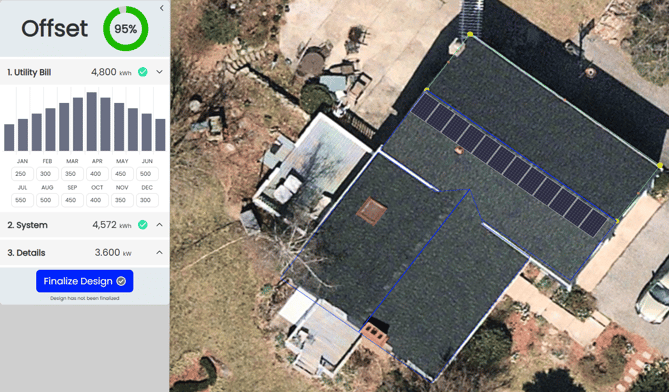
1. Review and Confirm Consumption Data
Consumption kWh data will be either automatically ported in from your Sales CRM, or can be added manually if you are just getting the consumption data in front of you for the first time.

2. View System Details and Select/Deselect Modules
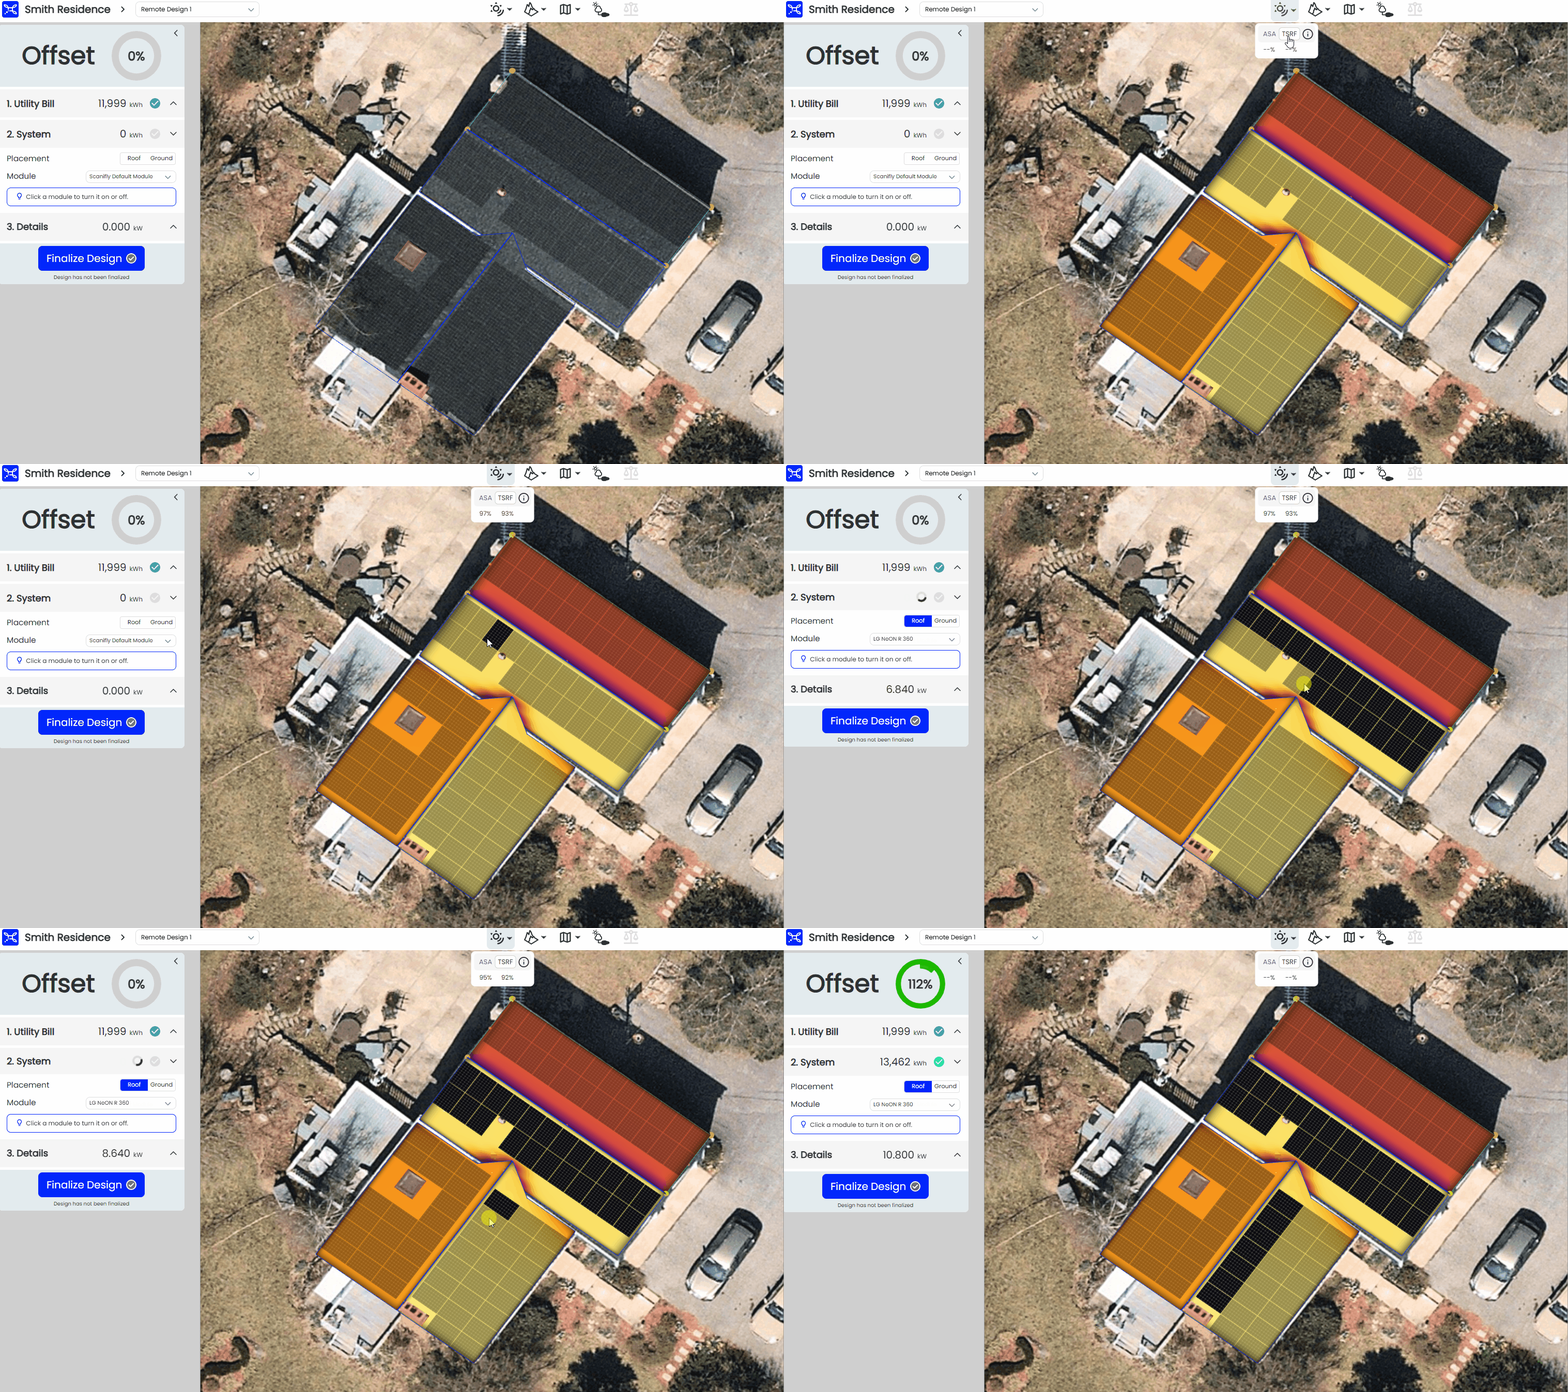
- All available roofs that can have modules placed on them will appear with greyed out modules.
- Tapping each module (or dragging across them) will turn them "on" and include the module(s) in production and offset calculations.
For the optimal layout: Enable the irradiance map in order to see the areas with the highest solar potential.
Turn modules on and off, or switch module type to configure the best layout that will meet the customers usage, while also meeting other customer needs.

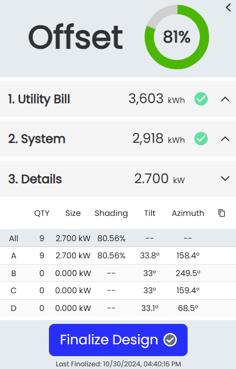
3. Review the system output and array details
Opening up the final step in the menu will show each individual segments module count, array size, TSRF, Tilt, and Azimuth.

4. Finalize Design
Upon tapping the finalize button, the project design will save. Depending on how your sales process is configured, we'll send production data, wireframes, and shading reports to your desired CRM or Proposal Tool.
If you have any questions, reach out to hello@scanifly.com or use the chat widget in the lower right corner of the Scanifly window.
Scanifly currently integrates with Energy Toolbase and Subcontractor Hub for proposal solutions. Check out our articles linked above for more info.