Creating 3D Models from Images
Before uploading your drone photos to Scanifly, you will want to make sure that you have access to a computer with a high speed internet connection.
Photo Uploading Tips
- Ensure you have a stable and high speed internet connection, using a wired (ethernet cable) internet connection if possible-Make sure that you do not upload any photos from our Do not upload these photos to Scanifly.
1. My Projects page > "New Project" Button
Navigate to your my projects page and click on the "New Project" button.
2. Add Customer Info

- Enter the Project Name
- Enter the Project Address - You can upload a single drone image by clicking on the Image Icon on the right side of the address box and it will automatically populate the address, latitude and longitude
- Click Save & Continue to get to the Consumption Data Field
If the yellow pin is not over the correct house, click and drag it to the correct location.

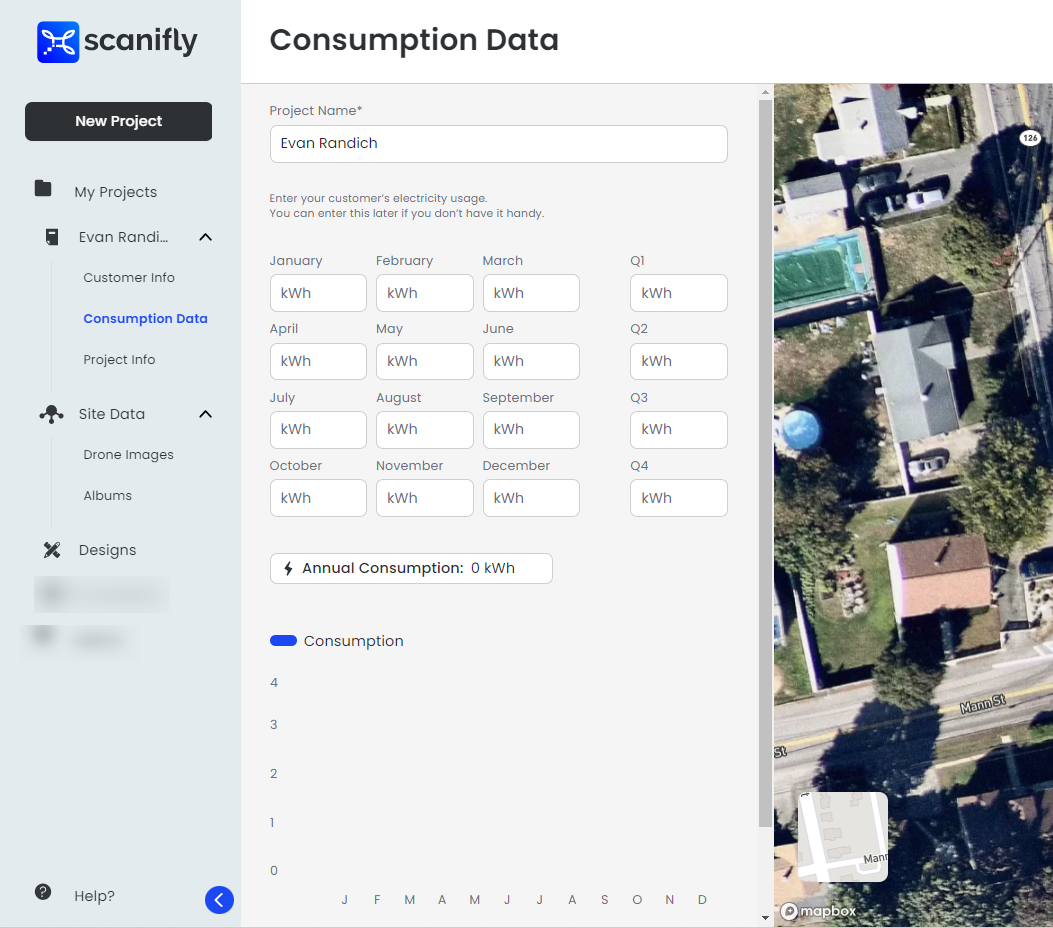
Consumption Data
The input field for consumption data can be found below the Customer Info tab, within the Project Name menu.
Customer usage information is not required to upload images.
3. Project Info
- Add any teammates that you would like to share this project with. It can also be updated at another time
- You may also designate this project to a Folder using the dropdown below the team member(s)
- Click Save & Continue

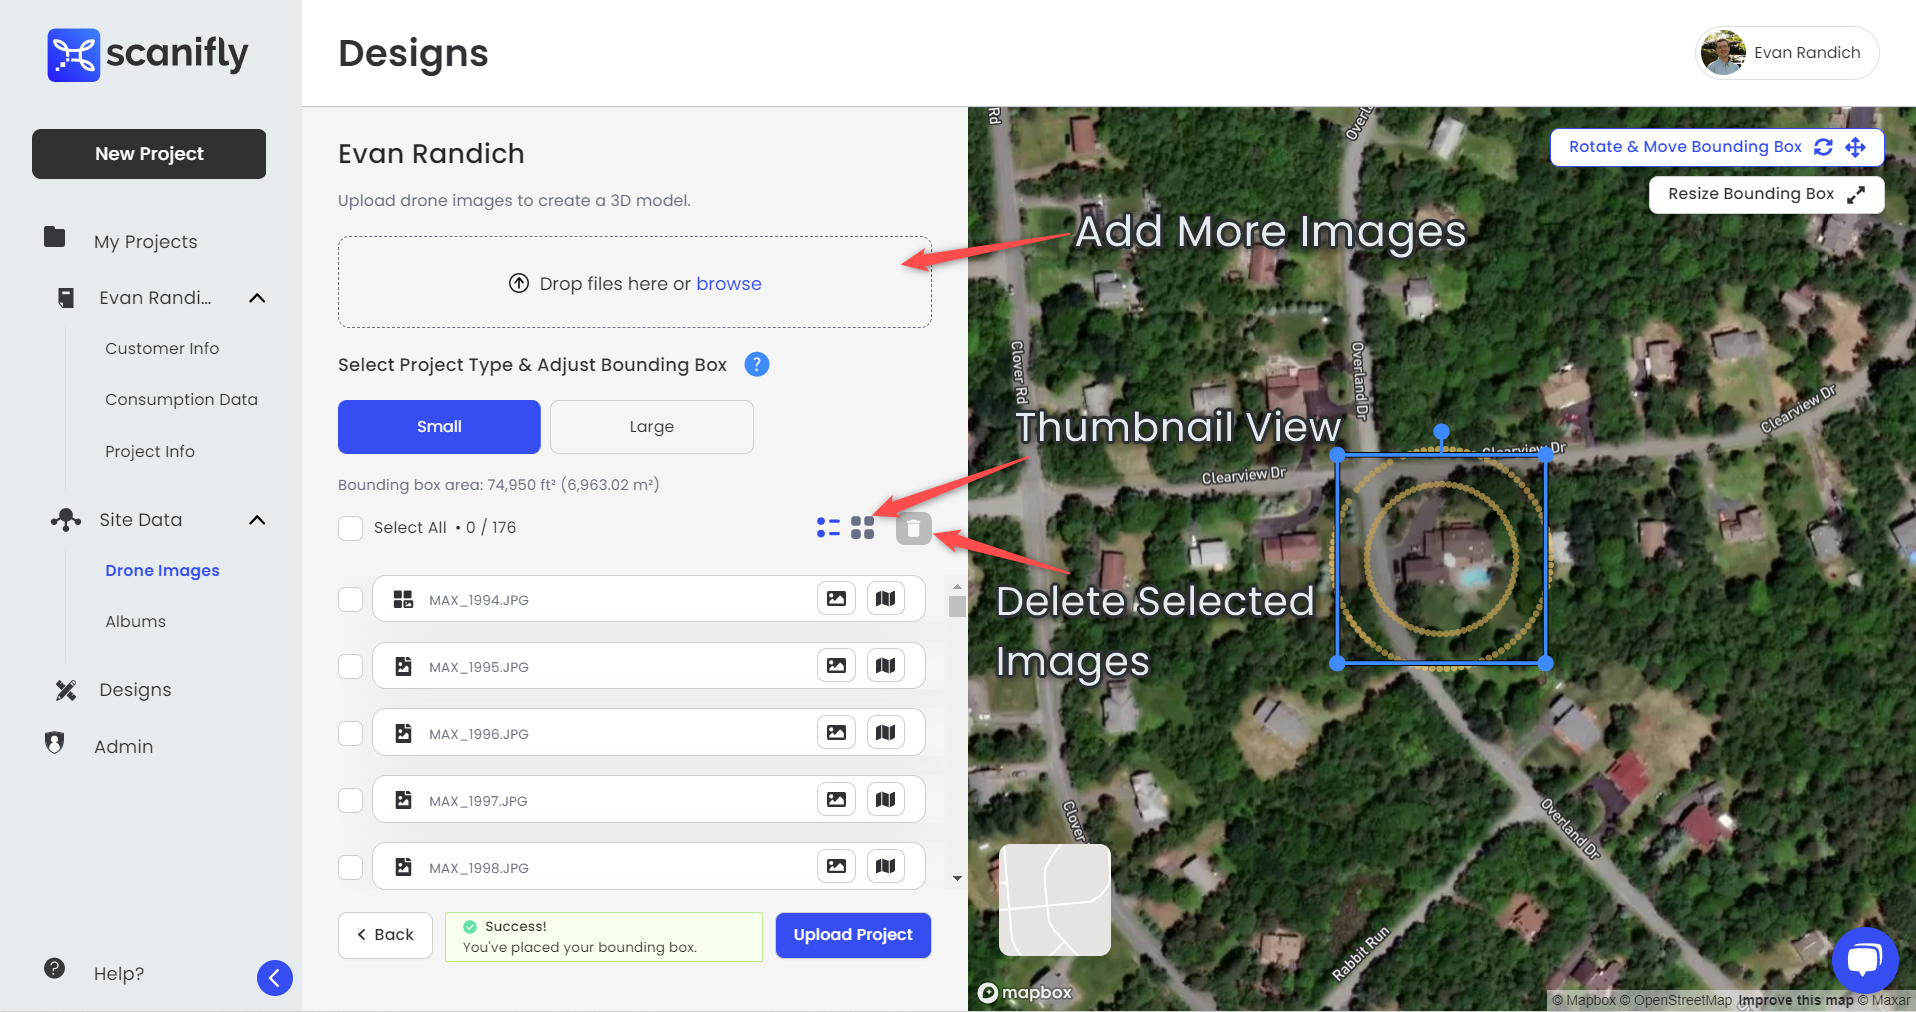
4. Designs
The "Designs" tab is where you upload your drone images to Scanifly. After selecting the +New Design button, you will be able to upload images to the design.
- Drag your images from a folder you have open into the pop-up box, or select "My Device" within the menu in that box and find the images in your device

Once you have uploaded your images, a bounding box will appear, sized around your images and according to your subscription to Scanifly.
5. Image Location review
You should see your photo locations overlaid on the google base layer in the location that they were taken, based on the image metadata.
You can visually check here to make sure the photos you took are showing up in the right location on the map.
6. Beware of Null Island!
If you notice a view like the one below, instead of the view above, you have images in your dataset that do not contain location metadata. These images are called "Null Island" images and will need to be removed from your dataset. "Null Island" images just have coordinates of (0,0).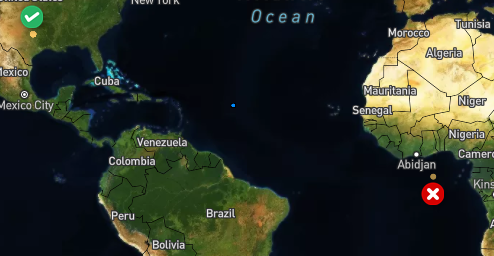
These images are a result of the pilot flying before they had a full GPS connection. If all are impacted, a re-fly of the site will be necessary. If you would like to learn more about geo-tagged images and how to resolve issues related to null islands, check out our support article What is a geo-tagged image?
7. Removing Images from the Dataset
You will see the list of images loaded. Simply select an image from the list or click on a yellow dot to highlight the image in the list. The trash can icon will turn red and you can then select it to delete an image. You may select multiple images at once for deleting.
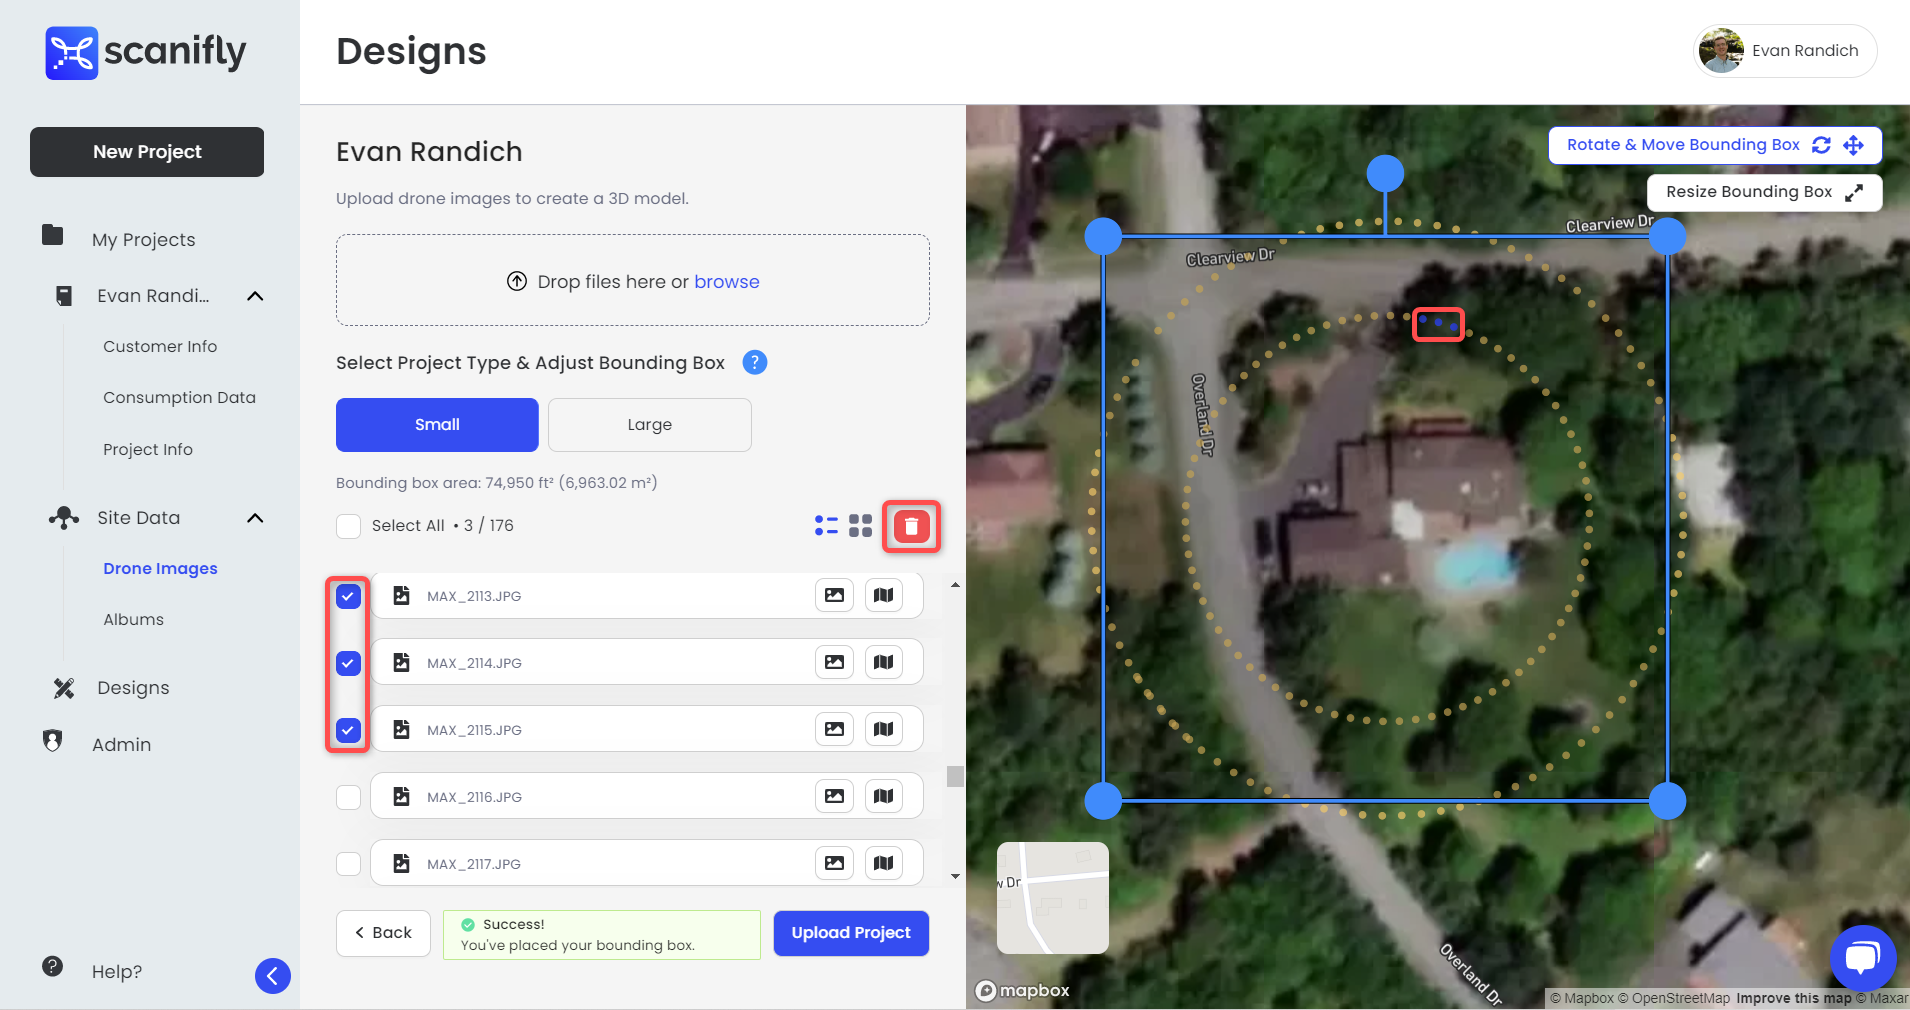
8. Adjusting Bounding Box
When adjusting your bounding box, be sure to include the entire area that you captured on site and that you would like to model in Scanifly.

9. Click Upload Project
Depending on your internet speed, the upload can take a few minutes or longer. See our System Requirements page for more information on recommended upload speed.
Leave the upload window open while the upload is in progress. Your upload has not completed until it has reached 100% and you see the window go away. If you have any problems with this step please contact our chat support for more assistance.
10. Wait for your project to finish processing
Typically Scanifly projects are finished processing within an hour. If your project has been processing for longer than 6 hours please reach out to chat support at the bottom right corner of the page.